Very Simple Way to Send Email Using NodeMCU firmware
Caution
This page hasn't recently updated. Information found here could be outdated and may lead to missconfiguration.
Some of the links and references may be broken or lead to non existing pages.
Please use this docs carefully. Most of the information here now is only for reference or example!
SMTP Server
Maybe some of you have already thought about sending email from NodeMCU powered module (ESP8266 ESP-01, ESP-07, etc). Maybe some of you have successfully written a code to send email from this little board. Now I want to show you a very simple way to implement email sending. I think there are a lot of way to do it, but instead of writing a code to send email directly using an smtp server I will use third party tool for it. The name of the service is MailGun. I have read an article which described a method using Mailgun for sending email. When I installed this Ghost Blog Engine, I got a warning message which showed that email service had not been configured properly, and gave me a link. In this article you can read about ghost email configuration, and it has a part about Mailgun configuration. Now I'm using this solution in my Ghost instance. But it is actually not important. While I was configuring Mailgun, I found an example api call using curl to send email via Mailgun. Link. The API example:
curl -s --user 'api:YOUR_API_KEY' \
    https://api.mailgun.net/v3/YOUR_DOMAIN_NAME/messages \
    -F from='Excited User <mailgun@YOUR_DOMAIN_NAME>' \
    -F to=YOU@YOUR_DOMAIN_NAME \
    -F to=bar@example.com \
    -F subject='Hello' \
    -F text='Testing some Mailgun awesomness!'
Some days later I was thinking. This curl example is a very simple and NodeMCU firmware is able to send HTTP POST messages. OK, maybe at the first sight it is not clear, but this curl example is actually a POST message. To come to the NodeMCU firmware, you have to build your firmware with HTTP module. To see what kind of messages are sent over the network after this curl example I created a tcpdump. It is important to send this request without SSL. Because with SSL connection you won't see anything in the dump. Example:
curl -s --user 'api:key-2bdec103ac5dea85b9378ab2541faecf' \
    http://blog.vinczejanos.info/v3/blog.vinczejanos.info/messages \
    -F from='blog@blog.vinczejanos.info' \
    -F to=janos.vincze@valami.com \
    -F subject='Hello' \
    -F text='Testing some Mailgun awesomness!'
This request returns with HTTP 404, but we are interested in only the request, not the response. Command: sudo tcpdump -s0 host api.mailgun.net -w pcap.pcap
This will create a pcap.pcap file, which can be opened in Wireshark.

We need the POST message to follow:
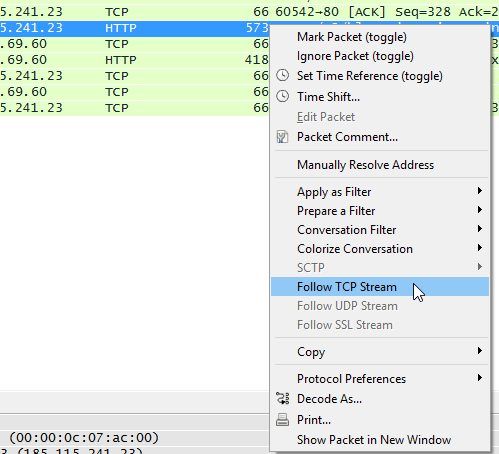
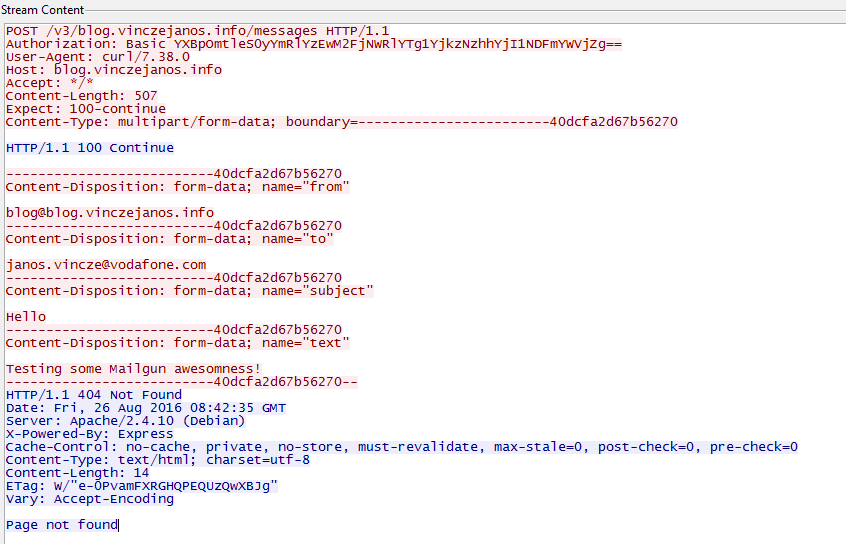
As I have written above we need only the request:
POST /v3/blog.vinczejanos.info/messages HTTP/1.1
Authorization: Basic YXBpOmtleS0yYmRlYzEwM2FjNWRlYTg1YjkzNzhhYjI1NDFmYWVjZg==
User-Agent: curl/7.38.0
Host: blog.vinczejanos.info
Accept: */*
Content-Length: 507
Expect: 100-continue
Content-Type: multipart/form-data; boundary=------------------------40dcfa2d67b56270

HTTP/1.1 100 Continue

--------------------------40dcfa2d67b56270
Content-Disposition: form-data; name="from"

blog@blog.vinczejanos.info
--------------------------40dcfa2d67b56270
Content-Disposition: form-data; name="to"

janos.vincze@valami.com
--------------------------40dcfa2d67b56270
Content-Disposition: form-data; name="subject"

Hello
--------------------------40dcfa2d67b56270
Content-Disposition: form-data; name="text"

Testing some Mailgun awesomness!
--------------------------40dcfa2d67b56270--
Authorization: Basic YXBpOmtleS0yYmRlYzEwM2FjNWRlYTg1YjkzNzhhYjI1NDFmYWVjZg== line. This very simple because HTTP Basic auth is base64 encoded so we can decrypt it by using tihs command:
echo -n "YXBpOmtleS0yYmRlYzEwM2FjNWRlYTg1YjkzNzhhYjI1NDFmYWVjZg==" | base64 -d
The result:
api:key-2bdec103ac5dea85b9378ab2541faecf
So the basic auth HTTP header contains your MailGun API key. This step is not necessary, I was only curious. If you do not want to create tcpdump to find out your basic auth key, simply use base64 command:
echo -n "api:key-2bdec103ac5dea85b9378ab2541faecf" | base64
YXBpOmtleS0yYmRlYzEwM2FjNWRlYTg1YjkzNzhhYjI1NDFmYWVjZg==
After that we have the first line of the header:
Based on the tcpdump we can assemble the HTTP header. You can see that MailGun API is using multipart/form-data MIME format, thus we have to use uniq boundary. If you want to know more about boundary or form-data MIME format please read the rfc2388 documentation. I will use dynamic generated boundary to avoid occurrence of it in the other part of the message.
I will use table.insert and table.concat to concatenate strings, because this method consume less memory then the simple .. (two dots).
So insted of this:
variable="string"..var.."another string"
I will use:
test_table={}
table.insert(test_table, "string")
table.insert(test_table, var)
table.insert(test_table, "another string")
string_result=table.concat(test_table)
test_table=nil
nil the table after concat.
1. Generate Boundary
boundary_table={}
for i=1,15
do
    table.insert(boundary_table, string.char(math.random(65, 90))) -- A-Z
    table.insert(boundary_table, string.char(math.random(48, 57))) -- 0-9
    table.insert(boundary_table, string.char(math.random(97, 122))) -- a-z
end
boundary=table.concat(boundary_table)
boundary_table=nil
B2bO4oH6gL2iZ7oK6jG2zA6vK3zO1wI9dG1gP0wV0tE3p
OK. I know this is a bit stupid way to generate random string, but working and just enough for us.
Assemble the Header Part
header_table={}
table.insert(header_table, 'Authorization: Basic YXBpOmtleS0yYmRlYzEwM2FjNWRlYTg1YjkzNzhhYjI1NDFmYWVjZg==\r\n')
table.insert(header_table, 'Host: api.mailgun.net\r\n')
table.insert(header_table, 'User-Agent: NodeMCU/testAg\r\n')
table.insert(header_table, 'Content-Type: multipart/form-data; boundary='..boundary..'\r\n')
header=table.concat(header_table)
header variable with these lines:
Authorization: Basic YXBpOmtleS0yYmRlYzEwM2FjNWRlYTg1YjkzNzhhYjI1NDFmYWVjZg==
Host: api.mailgun.net
User-Agent: NodeMCU/testAg
Content-Type: multipart/form-data; boundary=V1tS3eX4rA9sK6pV2nN2uD5zP7qP7uT5qV6lL0zI8pA4u
Assemble The "Body" Part (POST message)
data_table={}
table.insert(data_table, '--'..boundary..'\r\n')
table.insert(data_table, 'Content-Disposition: form-data; name="from"\r\n\r\n')
table.insert(data_table, 'admin@blog.vinczejanos.info\r\n')
table.insert(data_table, '--'..boundary..'\r\n')
table.insert(data_table, 'Content-Disposition: form-data; name="to"\r\n\r\n')
table.insert(data_table, 'jvincze84@gmail.com\r\n')
table.insert(data_table, '--'..boundary..'\r\n')
table.insert(data_table, 'Content-Disposition: form-data; name="subject"\r\n\r\n')
table.insert(data_table, 'Hello\r\n')
table.insert(data_table, '--'..boundary..'\r\n')
table.insert(data_table, 'Content-Disposition: form-data; name="text"\r\n\r\n')
table.insert(data_table, 'Congratulations Vincze Janos, you just sent an email with Mailgun!  You are truly awesome!\r\n\r\n')
table.insert(data_table, '--'..boundary..'--\r\n')
data=table.concat(data_table)
data_table=nil
data values contains the following:
--V1tS3eX4rA9sK6pV2nN2uD5zP7qP7uT5qV6lL0zI8pA4u
Content-Disposition: form-data; name="from"

admin@blog.vinczejanos.info
--V1tS3eX4rA9sK6pV2nN2uD5zP7qP7uT5qV6lL0zI8pA4u
Content-Disposition: form-data; name="to"

jvincze84@gmail.com
--V1tS3eX4rA9sK6pV2nN2uD5zP7qP7uT5qV6lL0zI8pA4u
Content-Disposition: form-data; name="subject"

Hello
--V1tS3eX4rA9sK6pV2nN2uD5zP7qP7uT5qV6lL0zI8pA4u
Content-Disposition: form-data; name="text"

Congratulations Vincze Janos, you just sent an email with Mailgun!  You are truly awesome!

--V1tS3eX4rA9sK6pV2nN2uD5zP7qP7uT5qV6lL0zI8pA4u--
There are some very important things:
- In the header part use your "raw" boundary value:
Content-Type: multipart/form-data; boundary=V1tS3eX4rA9sK6pV2nN2uD5zP7qP7uT5qV6lL0zI8pA4u - In the body part
- You have to place two
-sign before each boundaries:
--V1tS3eX4rA9sK6pV2nN2uD5zP7qP7uT5qV6lL0zI8pA4u
Content-Disposition: form-data; name="from" - BUT In case of the last boundary you have to add two
-to the beginning and to the end of the boundary.:
--**V1tS3eX4rA9sK6pV2nN2uD5zP7qP7uT5qV6lL0zI8pA4u--**
Send An E-Mail :)
Finally we can now send the email.
http.post('https://api.mailgun.net/v3/blog.vinczejanos.info/messages', header, data,
   function(code, data)
    if (code < 0) then
      print("HTTP request failed")
    else
      print(code, data)
    end
  end)
This message should be returned HTTP/200 OK after http.post.
> http.post('https://api.mailgun.net/v3/blog.vinczejanos.info/messages', header, post_data,
>> function(code, data)
>> if (code < 0) then
>> print("HTTP request failed")
>> else
>> print(code, data)
>> end
>> end)
> 200   {
  "id": "<20160826110622.24301.92312.4561825D@blog.vinczejanos.info>",
  "message": "Queued. Thank you."
}
If you don't like this method, you can find many other ways to implement email sending, or you can write a code on your own. For example on github there is implementation which uses smtp communication with NodeMCU net Module. Honestly I don't like sending email directly from the ESP9266 modules because it has very limited resources, but there are some cases when you can implement this code. For example if your code has little footprint. So If you write a rather "big" and complex code it is possible that not enough memory will be left to assemble the header and body part and call http.post(). Rather than sending email directly from esp8266 I advise to use NodeRED.